Commands reference
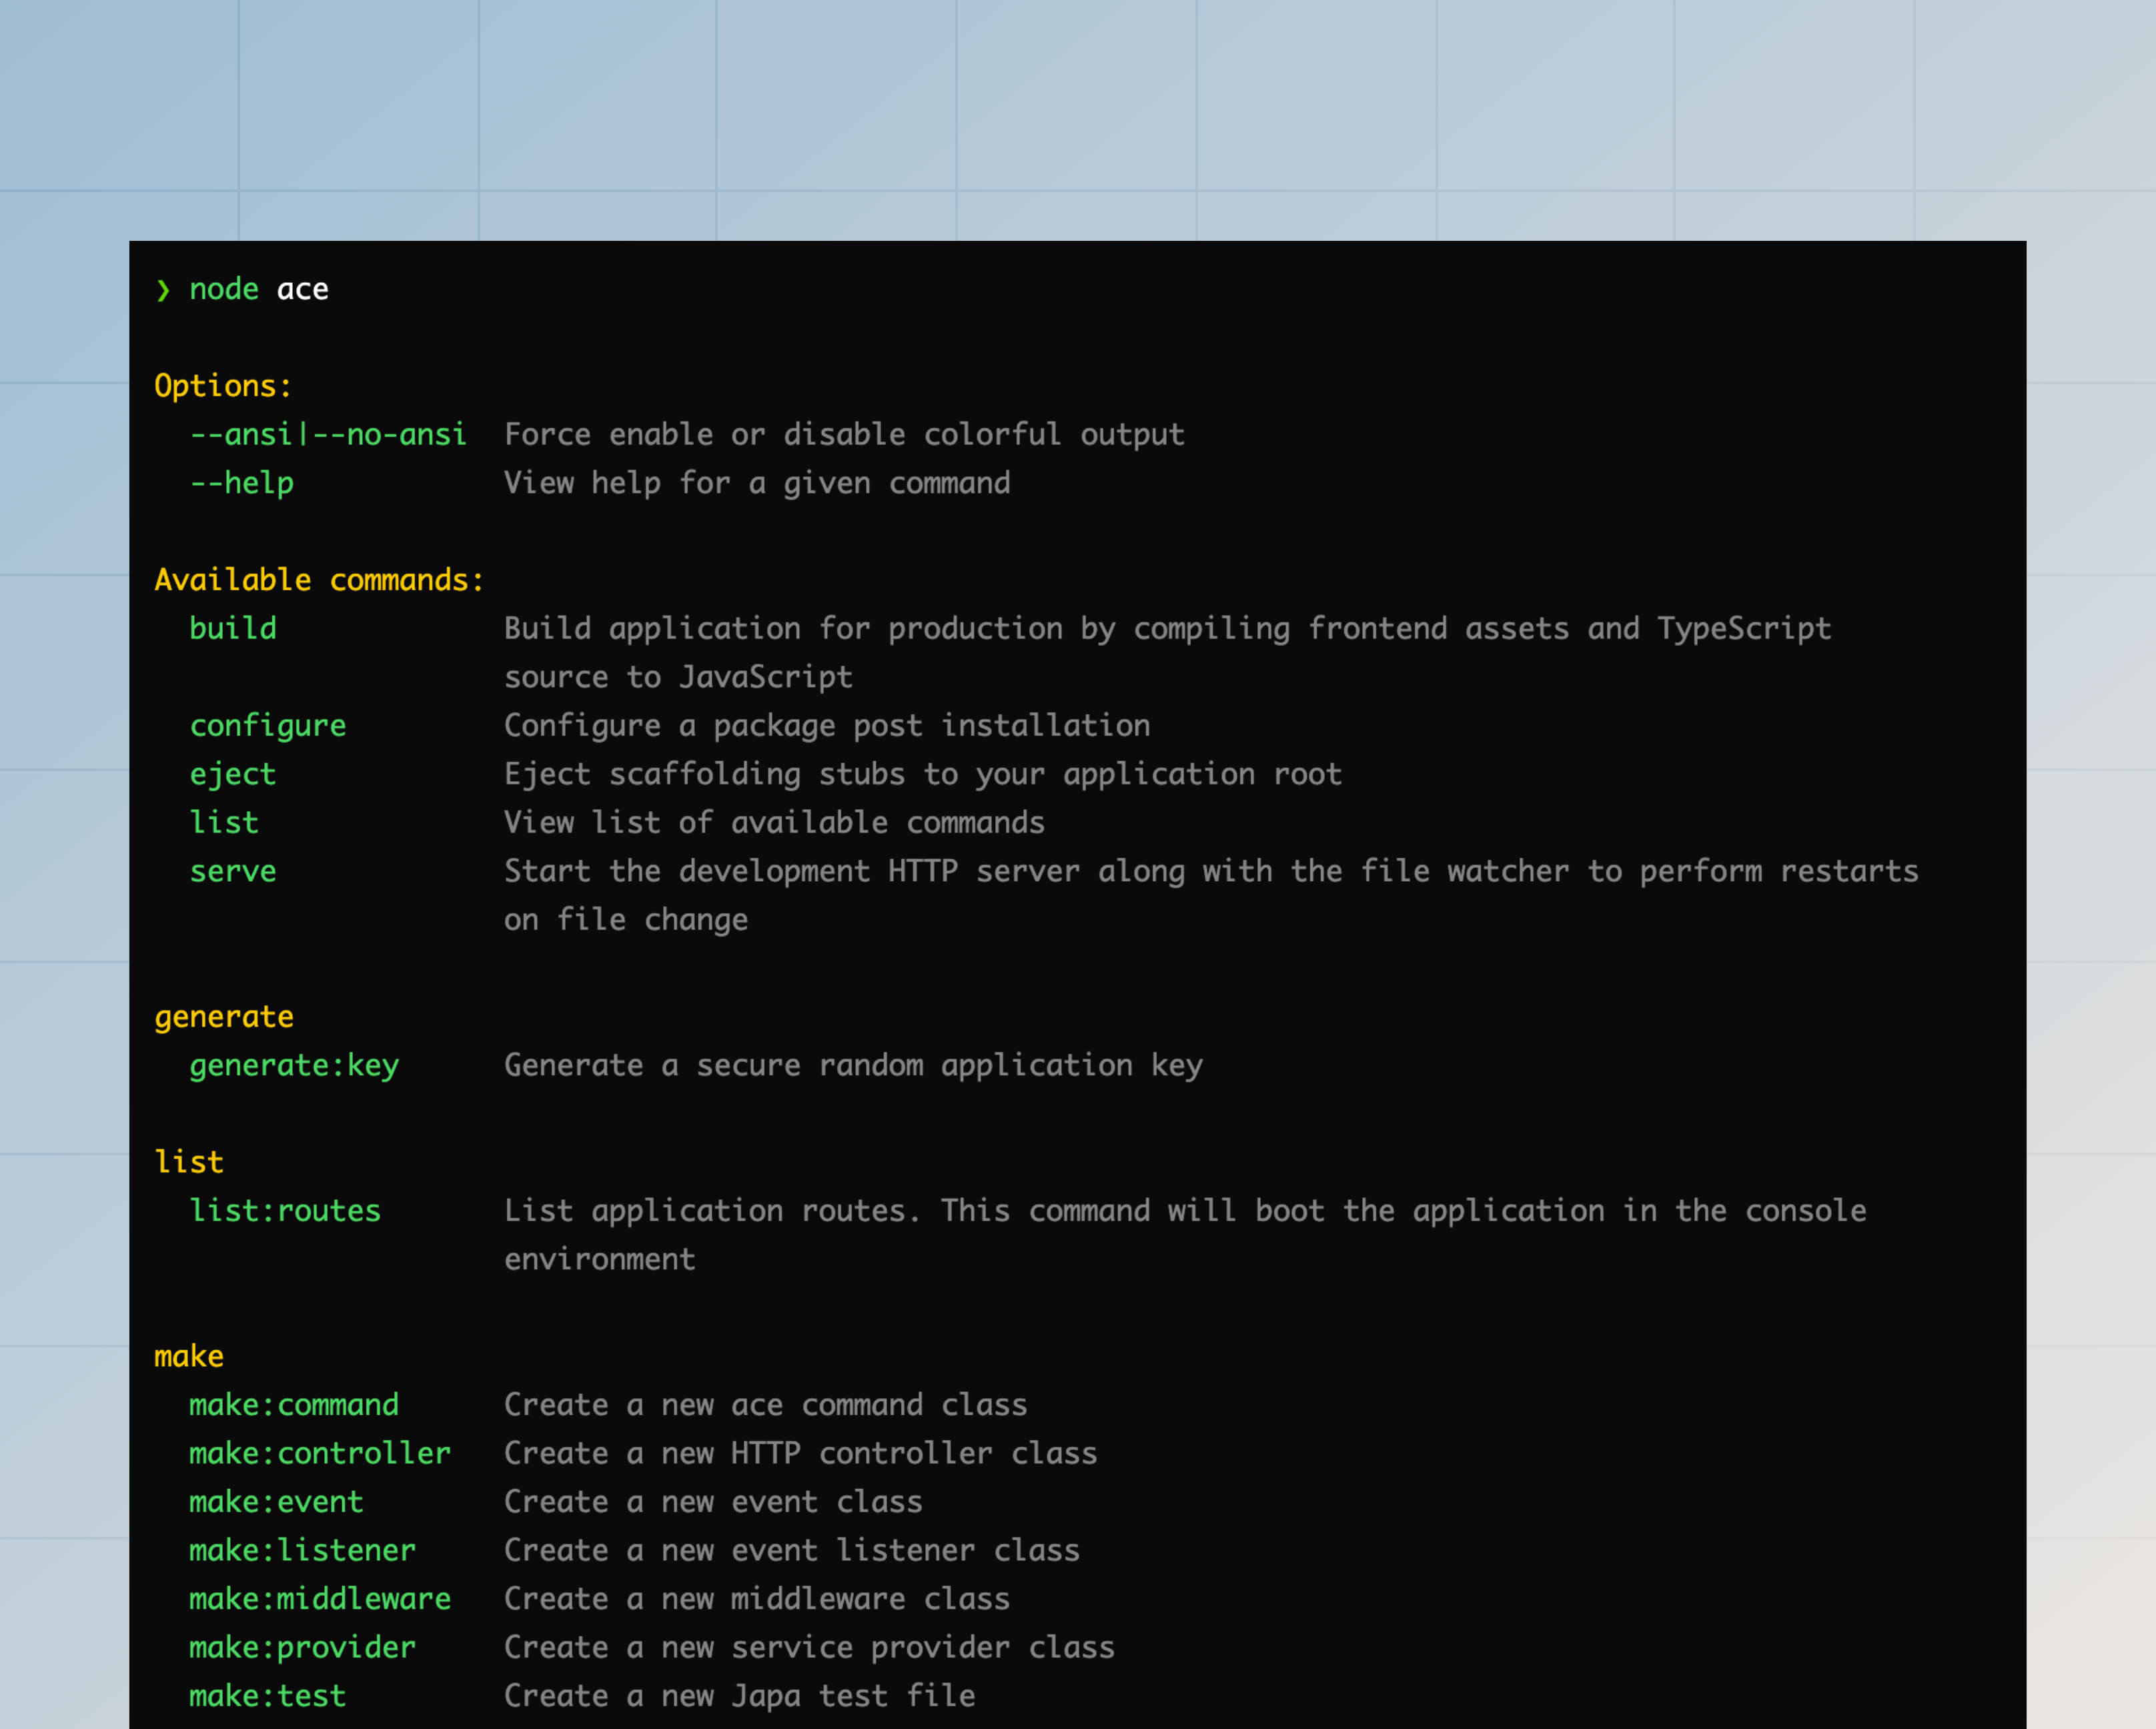
In this guide, we cover the usage of all the commands shipped with the framework core and the official packages. You may also view the commands help using the node ace list command or the node ace <command-name> --help command.
node ace list

The output of the help screen is formatted as per the docopt standard.
serve
The serve uses the @adonisjs/assembler package to start the AdonisJS application in development environment. You can optionally watch for file changes and restart the HTTP server on every file change.
node ace serve --watch
The serve command starts the development server (via bin/server.ts file) as a child process. If you want to pass node arguments to the child process, you can define them before the command name.
node ace --no-warnings --inspect serve --watch
Following is the list of available options you can pass to the serve command. Alternatively, use the --help flag to view the command's help.
-
--watch
-
Watch the filesystem and restart the HTTP server on file change.
-
--poll
-
Use polling to detect filesystem changes. You might want to use polling when using a Docker container for development.
-
--clear | --no-clear
-
Clear the terminal after every file change and before displaying the new logs. Use the
--no-clearflag to retain old logs. -
--assets | --no-assets
-
Start the assets bundle development server alongside the AdonisJS HTTP server. Use the
--no-assetsflag to turn off the assets bundler dev server. -
--assets-args
-
Pass commandline arguments to the asset manager child process. For example, if you use vite, you can define its options as follows.
node ace serve --watch --assets-args="--cors --open"
build
The build command uses the @adonisjs/assembler package to create the production build of your AdonisJS application. The following steps are performed to generate the build.
See also: TypeScript build process.
node ace build
Following is the list of available options you can pass to the build command. Alternatively, use the --help flag to view the command's help.
-
--ignore-ts-errors
-
The build command terminates the build process when your project has TypeScript errors. However, you can ignore those errors and finish the build using the
--ignore-ts-errorsflag. -
--package-manager
-
The build command copies the
package.jsonfile alongside the lock file of the package manager your application is using.We detect the package manager using the @antfu/install-pkg package. However, you can turn off detection by explicitly providing the package manager's name.
-
--assets | --no-assets
-
Bundle frontend assets alongside your backend application. Use the
--no-assetsflag to turn off the assets bundler dev server. -
--assets-args
-
Pass commandline arguments to the asset manager child process. For example, if you use vite, you can define its options as follows.
node ace serve --watch --assets-args="--sourcemap --debug"
configure
Configure a package after it has been installed. The command accepts the package name as the first argument.
node ace configure @adonisjs/lucid
-
--verbose
-
Enable verbose mode to display the package installation logs.
-
--force
-
The stubs system of AdonisJS does not overwrite existing files. For example, if you configure the
@adonisjs/lucidpackage and your application already has aconfig/database.tsfile, the configure process will not overwrite the existing config file.However, you can force overwrite files using the
--forceflag.
eject
Eject stubs from a given package to your application stubs directory. In the following example, we copy the make/controller stubs to our application for modification.
See also: Customizing stubs
# Copy stub from @adonisjs/core package
node ace eject make/controller

# Copy stub from @adonisjs/bouncer package
node ace eject make/policy --pkg=@adonisjs/bouncer
generate:key
Generate a cryptographically secure random key and write to the .env file as the APP_KEY environment variable.
See also: App key
node ace generate:key
-
--show
-
Display the key on the terminal instead of writing it to the
.envfile. By default, the key is written to the env file. -
--force
-
The
generate:keycommand does not write the key to the.envfile when running your application in production. However, you can use the--forceflag to override this behavior.
make:controller
Create a new HTTP controller class. Controllers are created inside the app/controllers directory and use the following naming conventions.
- Form:
plural - Suffix:
controller - Class name example:
UsersController - File name example:
users_controller.ts
node ace make:controller users
You also generate a controller with custom action names, as shown in the following example.
# Generates controller with "index", "show", and "store" methods
node ace make:controller users index show store
-
--singular
-
Force the controller name to be in singular form.
-
--resource
-
Generate a controller with methods to perform CRUD operations on a resource.
-
--api
-
The
--apiflag is similar to the--resourceflag. However, it does not define thecreateand theeditmethods since they are used to display forms.
make:middleware
Create a new middleware for HTTP requests. Middleware are stored inside the app/middleware directory and uses the following naming conventions.
- Form:
singular - Suffix:
middleware - Class name example:
BodyParserMiddleware - File name example:
body_parser_middleware.ts
node ace make:middleware bodyparser
-
--stack
-
Skip the middleware stack selection prompt by defining the stack explicitly. The value must be
server,named, orrouter.node ace make:middleware bodyparser --stack=router
make:event
Create a new event class. Events are stored inside the app/events directory and use the following naming conventions.
- Form:
NA - Suffix:
NA - Class name example:
OrderShipped - File name example:
order_shipped.ts - Recommendation: You must name your events around the lifecycle of an action. For example:
MailSending,MailSent,RequestCompletedand so on.
node ace make:event orderShipped
make:validator
Create a new VineJS validator file. The validators are stored inside the app/validators directory, and each file may export multiple validators.
- Form:
singular - Suffix:
NA - File name example:
user.ts - Recommendation: You must create validator files around the resources of your application.
# A validator for managing a user
node ace make:validator user

# A validator for managing a post
node ace make:validator post
-
--resource
-
Create a validator file with pre-defined validators for
createandupdateactions.node ace make:validator post --resource
make:listener
Create a new event listener class. The listener classes are stored inside the app/listeners directory and use the following naming conventions.
- Form:
NA - Suffix:
NA - Class name example:
SendShipmentNotification - File name example:
send_shipment_notification.ts - Recommendation: The event listeners must be named after the action they perform. For example, a listener that sends the shipment notification email should be called
SendShipmentNotification.
node ace make:listener sendShipmentNotification
-
--event
-
Generate an event class alongside the event listener.
node ace make:listener sendShipmentNotification --event=shipment_received
make:service
Create a new service class. Service classes are stored inside the app/services directory and use the following naming conventions.
A service has no pre-defined meaning, and you can use it to extract the business logic inside your application. For example, if your application generates a lot of PDFs, you may create a service called PdfGeneratorService and reuse it in multiple places.
- Form:
singular - Suffix:
service - Class name example:
InvoiceService - File name example:
invoice_service.ts
node ace make:service invoice
make:exception
Create a new custom exception class. Exceptions are stored inside the app/exceptions directory.
- Form:
NA - Suffix:
exception - Class name example:
CommandValidationException - File name example:
command_validation_exception.ts
node ace make:exception commandValidation
make:command
Create a new Ace command. By default, the commands are stored inside the commands directory at the root of your application.
Commands from this directory are imported automatically by AdonisJS when you try to execute any Ace command. You may prefix the filename with an _ to store additional files that are not Ace commands in this directory.
- Form:
NA - Suffix:
NA - Class name example:
ListRoutes - File name example:
list_routes.ts - Recommendation: Commands must be named after the action they perform. For example,
ListRoutes,MakeController, andBuild.
node ace make:command listRoutes
make:view
Create a new Edge.js template file. The templates are created inside the resources/views directory.
- Form:
NA - Suffix:
NA - File name example:
posts/view.edge - Recommendation: You must group templates for a resource inside a subdirectory. For example:
posts/list.edge,posts/create.edge, and so on.
node ace make:view posts/create
node ace make:view posts/list
make:provider
Create a service provider file. Providers are stored inside the providers directory at the root of your application and use the following naming conventions.
- Form:
singular - Suffix:
provider - Class name example:
AppProvider - File name example:
app_provider.ts
node ace make:provider app
-
--environments
-
Define environments in which the provider should get imported. Learn more about app environments
node ace make:provider app -e=web -e=console
make:preload
Create a new preload file. Preload files are stored inside the start directory.
node ace make:preload view
-
--environments
-
Define environments in which the preload file should get imported. Learn more about app environments
node ace make:preload view app -e=web -e=console
make:test
Create a new test file inside the tests/<suite> directory.
- Form: NA
- Suffix:
.spec - File name example:
posts/list.spec.ts,posts/update.spec.ts
node ace make:test --suite=unit
-
--suite
-
Define the suite for which you want to create the test file. Otherwise, the command will display a prompt for suite selection.
make:mail
Create a new mail class inside the app/mails directory. The mail classes are suffixed with the Notification keyword. However, you may define a custom suffix using the --intent CLI flag.
- Form: NA
- Suffix:
Intent - Class name example: ShipmentNotification
- File name example: shipment_notification.ts
node ace make:mail shipment
# ./app/mails/shipment_notification.ts
-
--intent
-
Define a custom intent for the mail.
node ace make:mail shipment --intent=confirmation# ./app/mails/shipment_confirmation.tsnode ace make:mail storage --intent=warning# ./app/mails/storage_warning.ts
make:policy
Create a new Bouncer policy class. The policies are stored inside the app/policies folder and use the following naming conventions.
- Form:
singular - Suffix:
policy - Class name example:
PostPolicy - File name example:
post_policy.ts
node ace make:policy post
inspect:rcfile
View the contents of the adonisrc.ts file after merging the defaults. You may use this command to inspect the available configuration options and override them per your application requirements.
See also: AdonisRC file
node ace inspect:rcfile
list:routes
View list of routes registered by your application. This command will boot your AdonisJS application in the console environment.
node ace list:routes
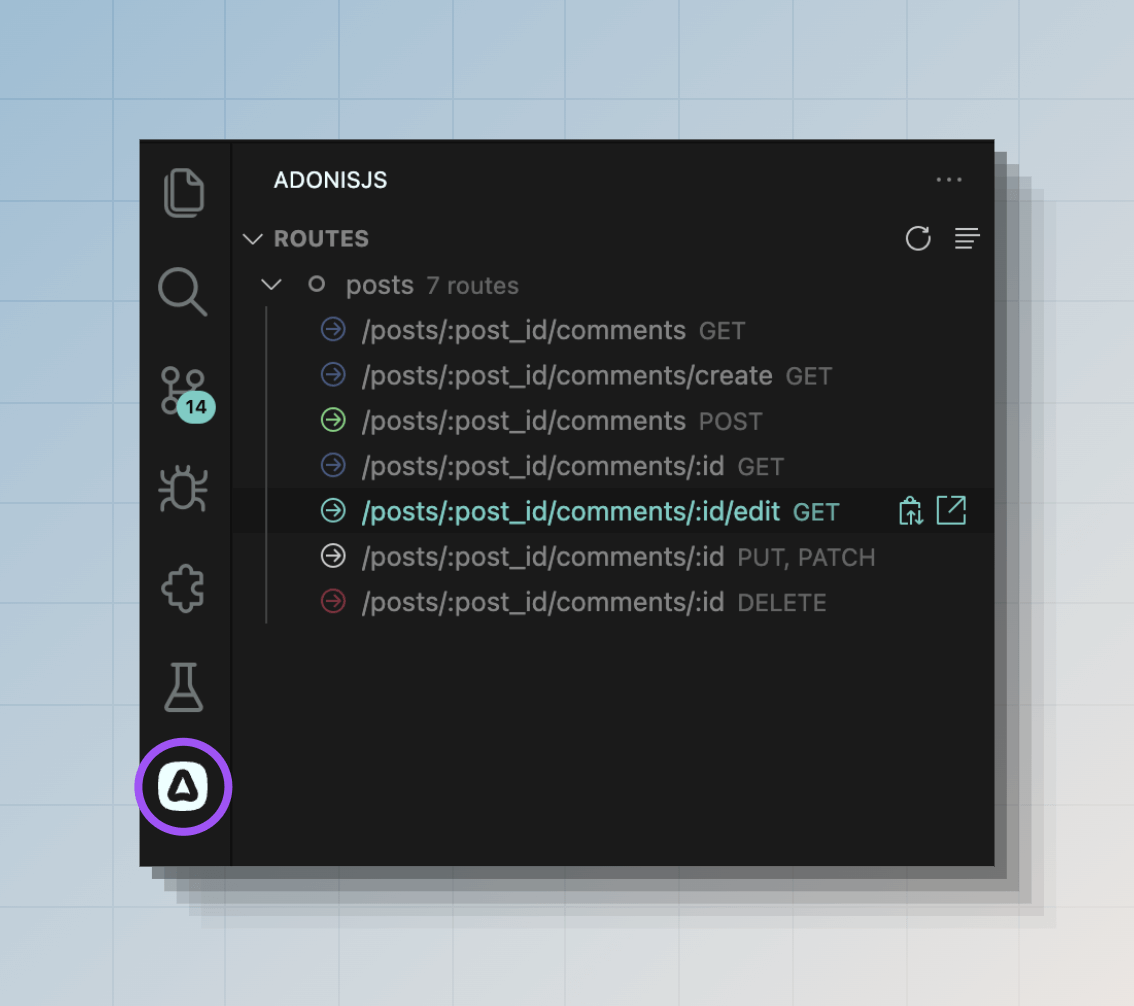
Also, you can see the routes list from the VSCode activity bar if you are using our official VSCode extension.

-
--json
-
View routes as a JSON string. The output will be an array of object.
-
--table
-
View routes inside a CLI table. By default, we display routes inside a compact, pretty list.
-
--middleware
-
Filter routes list and include the ones using the mentioned middleware. You may use the
*keyword to include routes using one or more middleware. -
--ignore-middleware
-
Filter routes list and include the ones NOT using the mentioned middleware. You may use the
*keyword to include routes that do not use any middleware.